Quarto website 3: Deploying your website with GitHub 🐱
Using GitHub, GitHub Desktop, and GitHub Pages to deploy our website 🤩️.
1 Introduction
We are continuing this semester’s Code Club series on making yourself a website. So far, we have gone through:
- How to initiate your site
- How to add content
- How to customize its look
Today, we are going to take our website live, with the help of GitHub, Github Desktop, and Github Pages. You can find all the source code for this practice website on GitHub.
The book Happy Git and GitHub for the useR is a super good resource by Jenny Bryan that talks about all this in extreme detail. Some of my materials below are inspired by some of this material.
1.1 What is Git?
Git is a version control system that allows materials (mostly code), in an organized way where changes are tracked. You can think of it as combining the tracked changes capabilities of Word, with the file sharing from OneDrive.
We are going to use Git (combined with GitHub, more on that in a second) to deploy our website, but it can also be used to share and make code available to collaborators or the wider data science community. You could even use Git for just yourself because it would allow you to always revert back to a previous version of any of your files in case you make a big mistake.
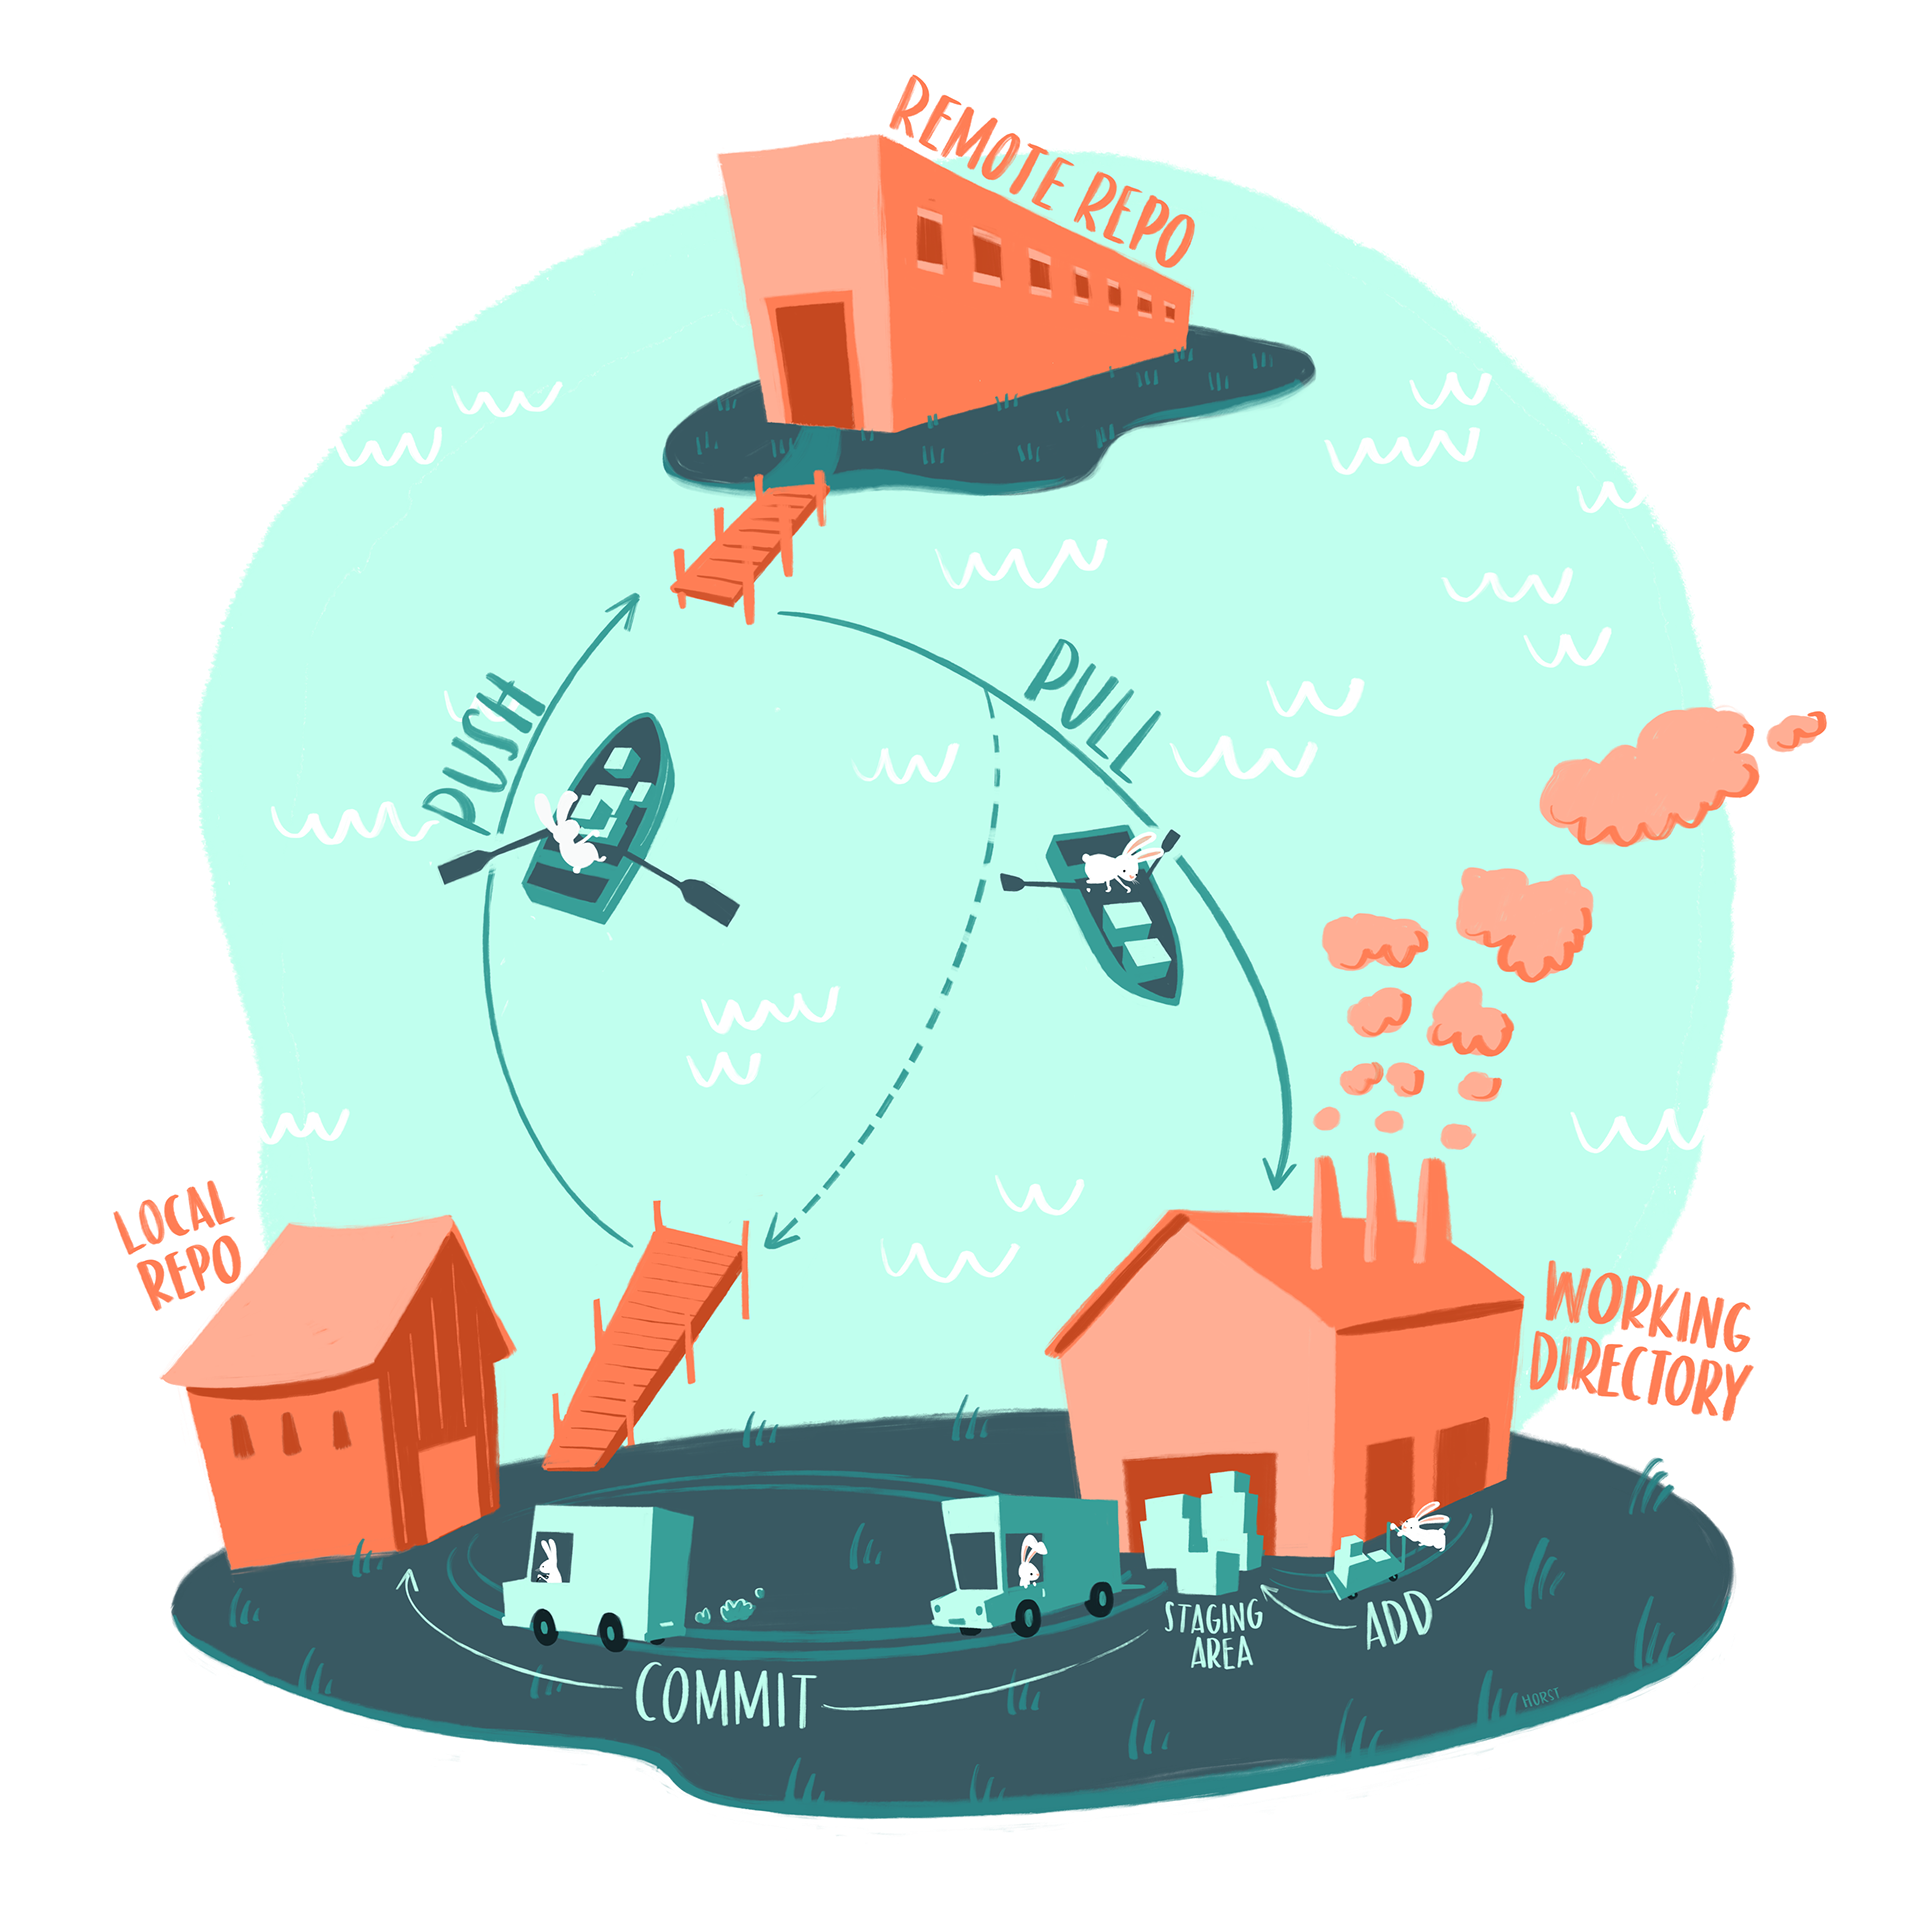
Here is a nice illustration by Allison Horst that shows the basics of git (at least the basics of what we will be using).
1.2 What is GitHub?
GitHub hosts Git-based projects. GitHub can be free (especially for academic projects), and is where we house all our Code Club content. I additionally use GitHub in my lab for creating code repositories that go along with our publications.
1.3 What is GitHub Pages?
GitHub Pages is a tool allows you to host your website directly from a GitHub repository.
1.4 What is GitHub Desktop?
GitHub Desktop is a application that lets you use Git and GitHub in a less-scary-than-working-in-your-terminal way. Here is a longer tutorial on how to use GitHub desktop.
2 Set output directory in YAML to docs
The first thing we want to do, is make a change in your _quarto.yml file to what the output directory of the site is, so it is more compatible with GitHub Pages.
Go into your _quarto.yml and under project:, set output-dir: docs, like this:
---
project:
  type: website
  output-dir: docs
---
What this does is change where the compiled website goes.
There are three different ways you can publish Quarto websites to GitHub pages, but the one I am going over here is the simplest.
Be sure to build your page now by going to the Build tab in the top right quadrant, and click Render Website.
3 Install Git
If you don’t already have Git, download and install it: https://git-scm.com/downloads.
4 Create a GitHub account
In order to connect have your site hosted with GitHub and GitHub Pages, you need a GitHub account.
Create a GitHub account by going to github.com/join.
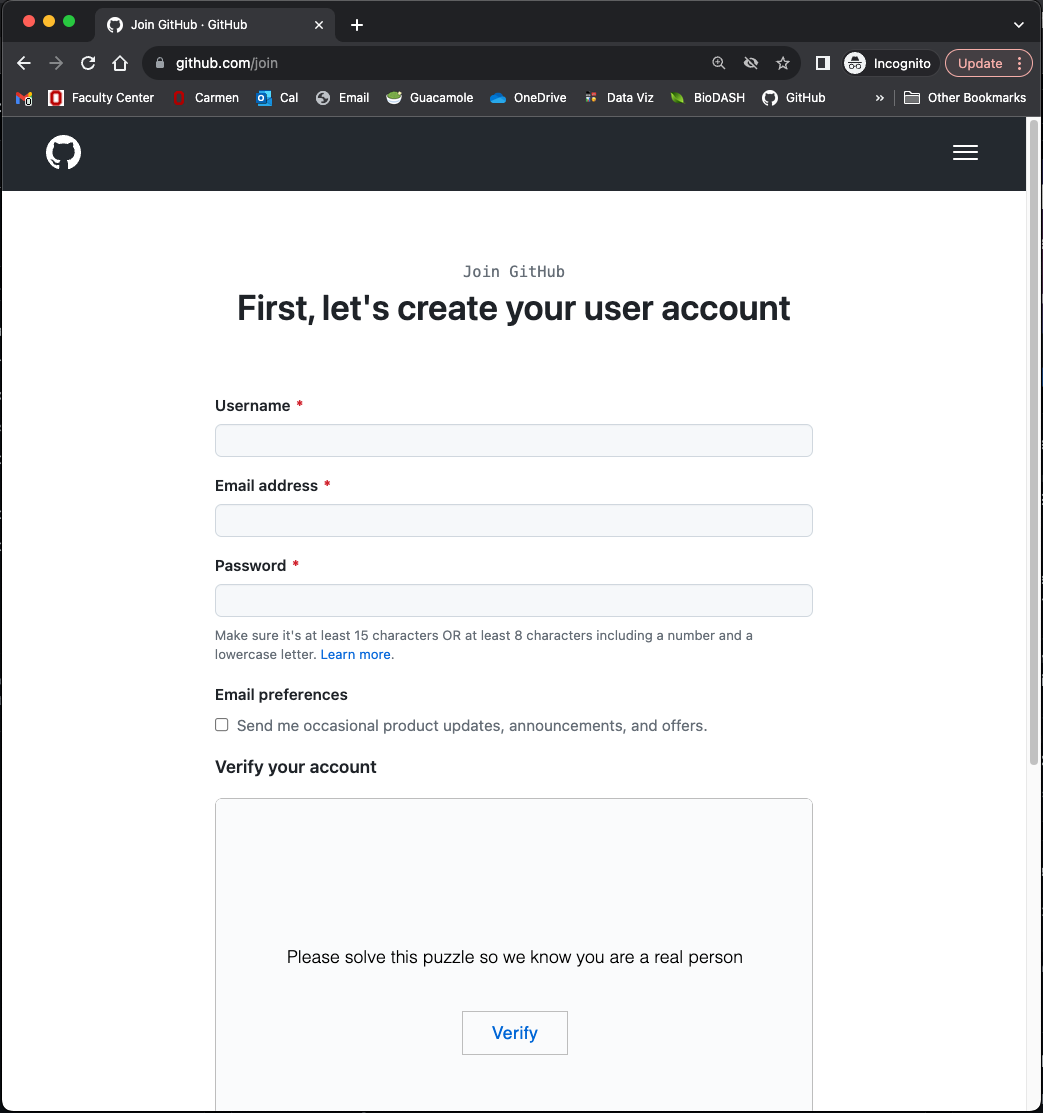
You will have to pick a username - remember that other people will see this username so use one you’d feel comfortable with. Here is some advice for picking a username.
5 Install GitHub Desktop and link it to your account
We are going to interface with GitHub via Github Desktop because I think this is the easiest way to do it. It is definitely not the only way.
First download GitHub Desktop and install it: https://desktop.github.com/
Open GitHub Desktop and log into your GitHub account by going to Preferences > Accounts > Sign in
6 Add version control to your website project
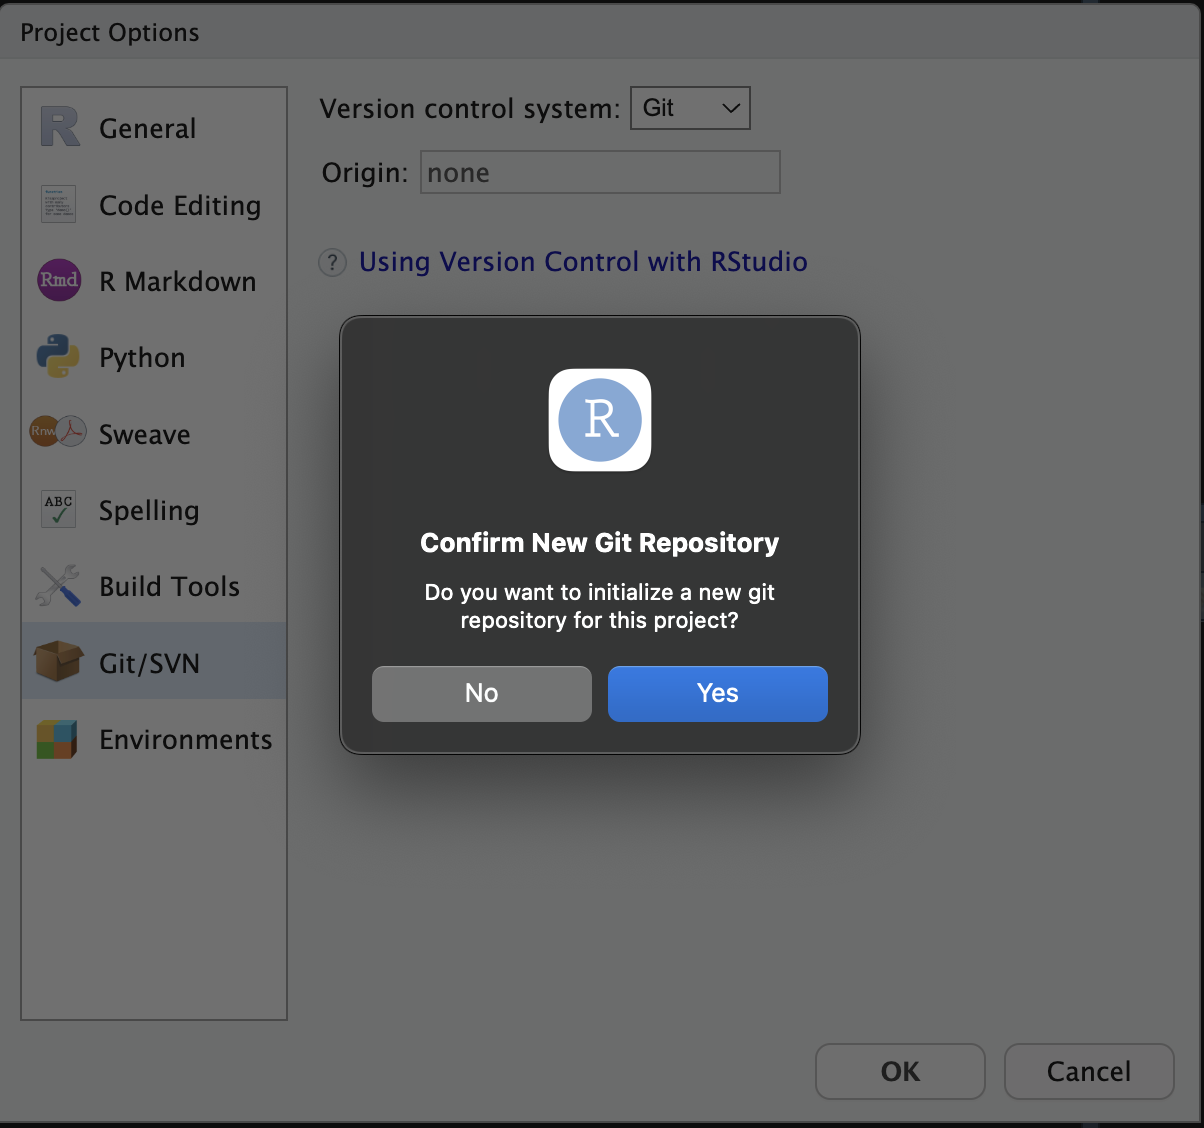
Make sure that your website project is open in RStudio. Then go to Tools > Version Control > Project Setup. We will use Git as our version control system, and will confirm a new git repository.
7 Add your repository in GitHub Desktop and publish it
Now we are going to link this project that has version control with GitHub Desktop.
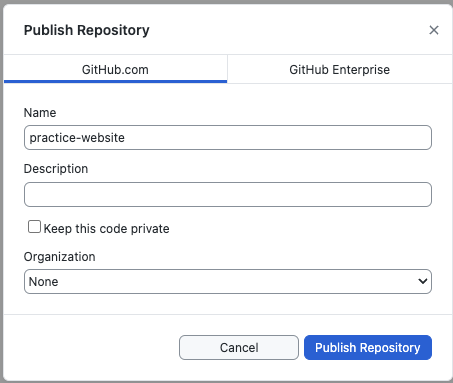
In GitHub Desktop, click File > Add Local Repository, select your website’s top-level folder, and click Add Repository. This repo is now added to GitHub desktop. Still in GitHub Desktop, click the large Publish repository button towards the top. Uncheck the Keep this code private box and click Publish Repository.
8 Commit and push your website to GitHub
Still in GitHub Desktop,r click the refresh button at the top middle. You should see a bunch of files (all those that comprise your website) under Changes in the tab on the left side.
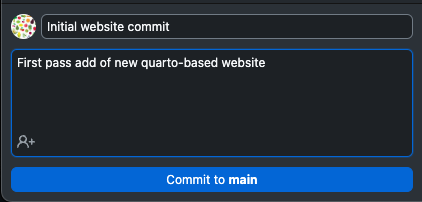
We are going to now commit our files along with a comment on what we are doing in the bottom left of GitHub desktop. Once you’ve written your comment, press Commit to main. This sends your files to your local repo.
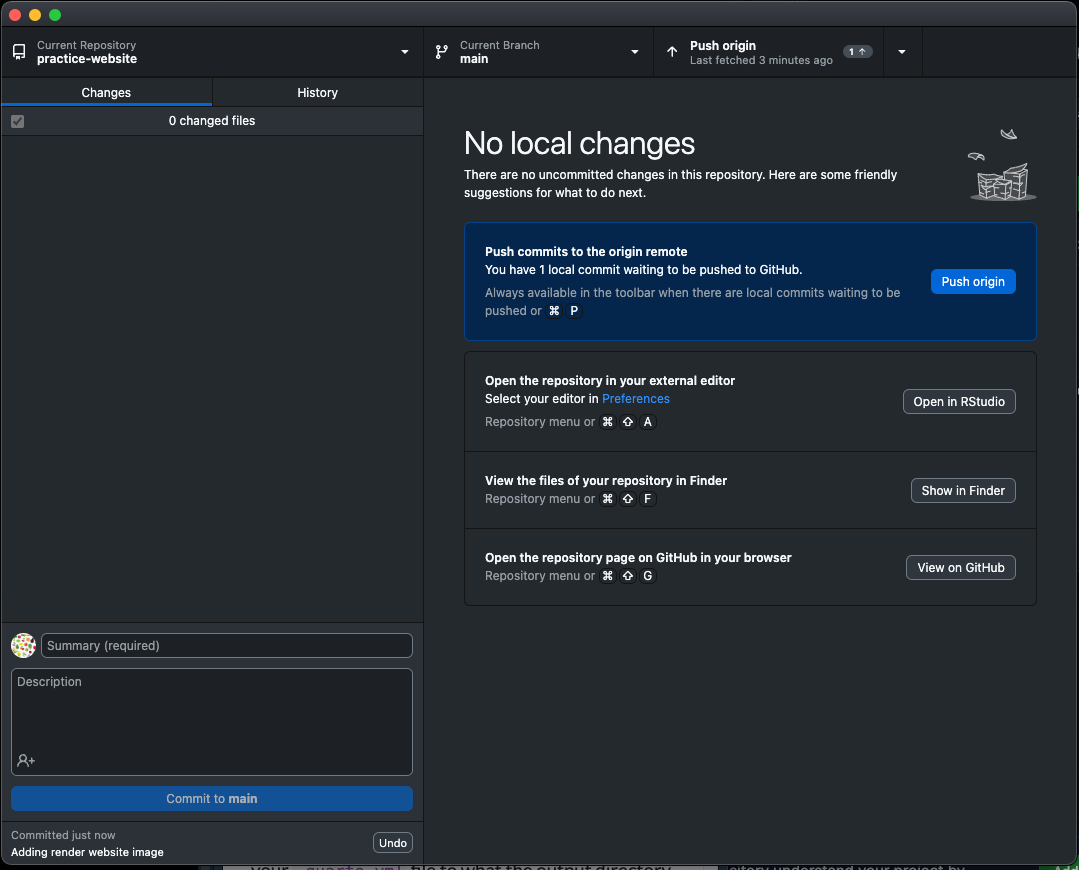
Once you’ve done that, click Push origin in the top right. This sends your files from your local repository to GitHub. Note that in the screenshot below there are no files indicated under changes, since I’ve already committed them.
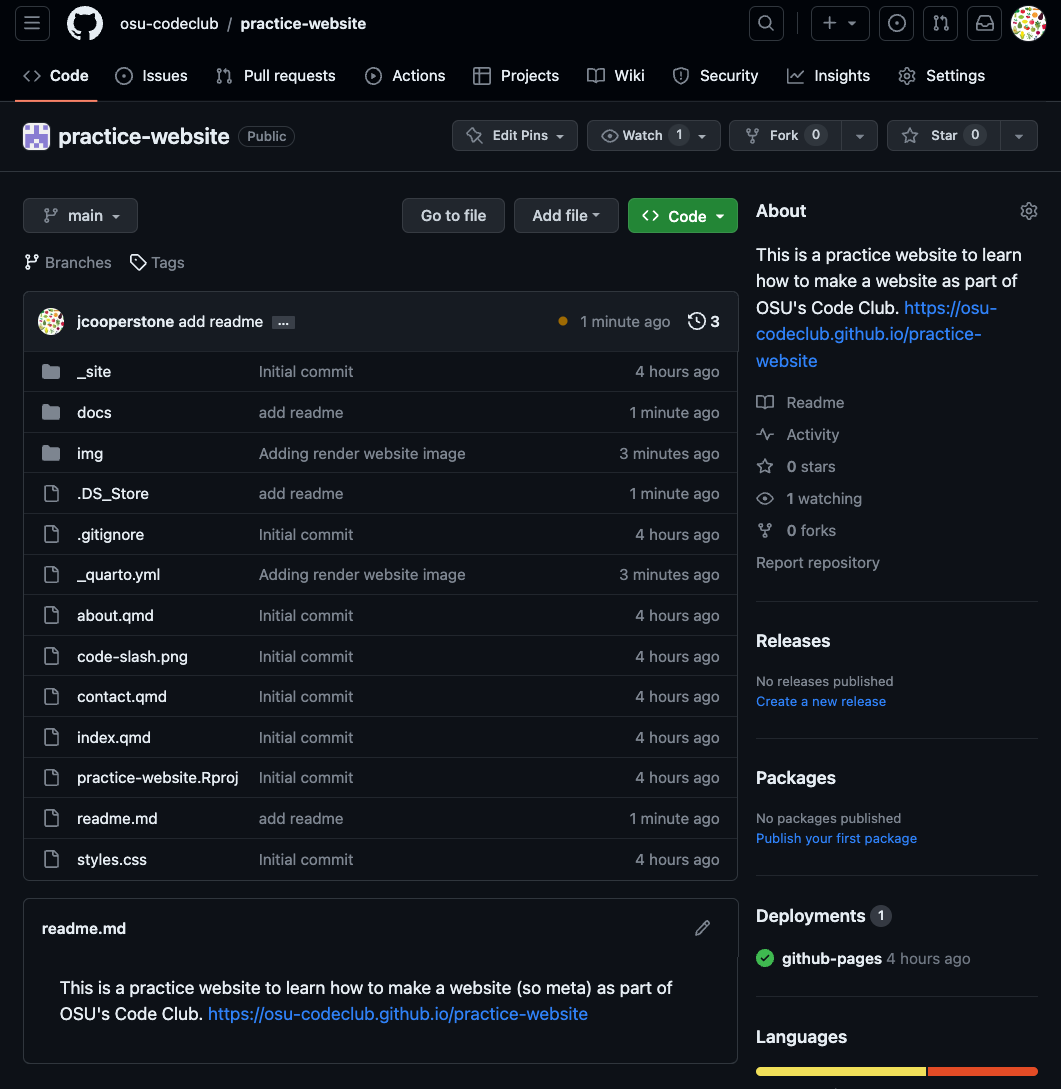
Nice! Now we should be able to see your website in your GitHub repo. Navigate there in your browser and check. The website files should be there.
9 Set GitHub Pages to deploy from docs
The last thing we need to do to get our website to render is to change some settings for GitHub Pages.
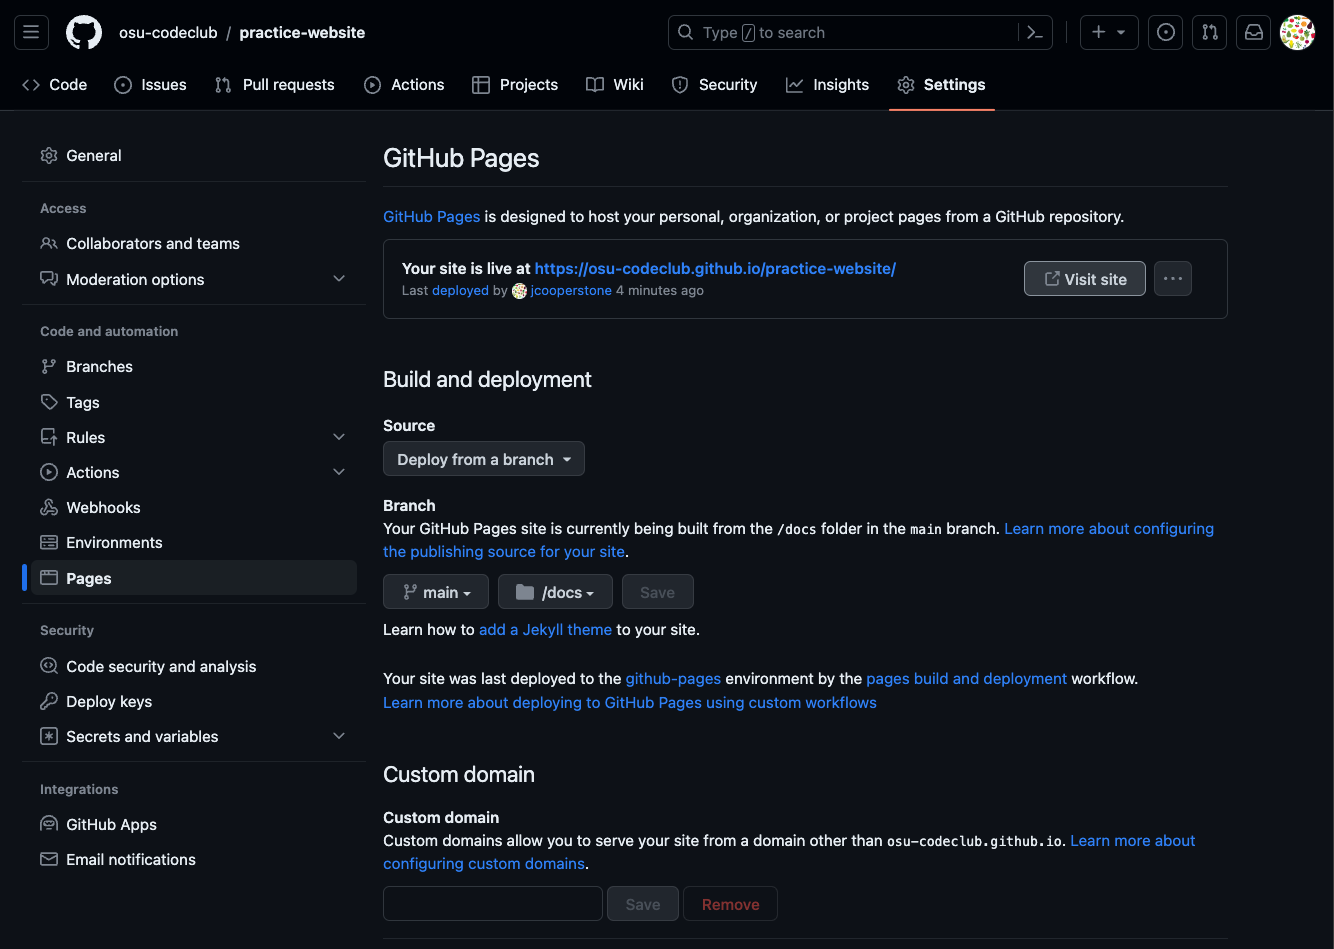
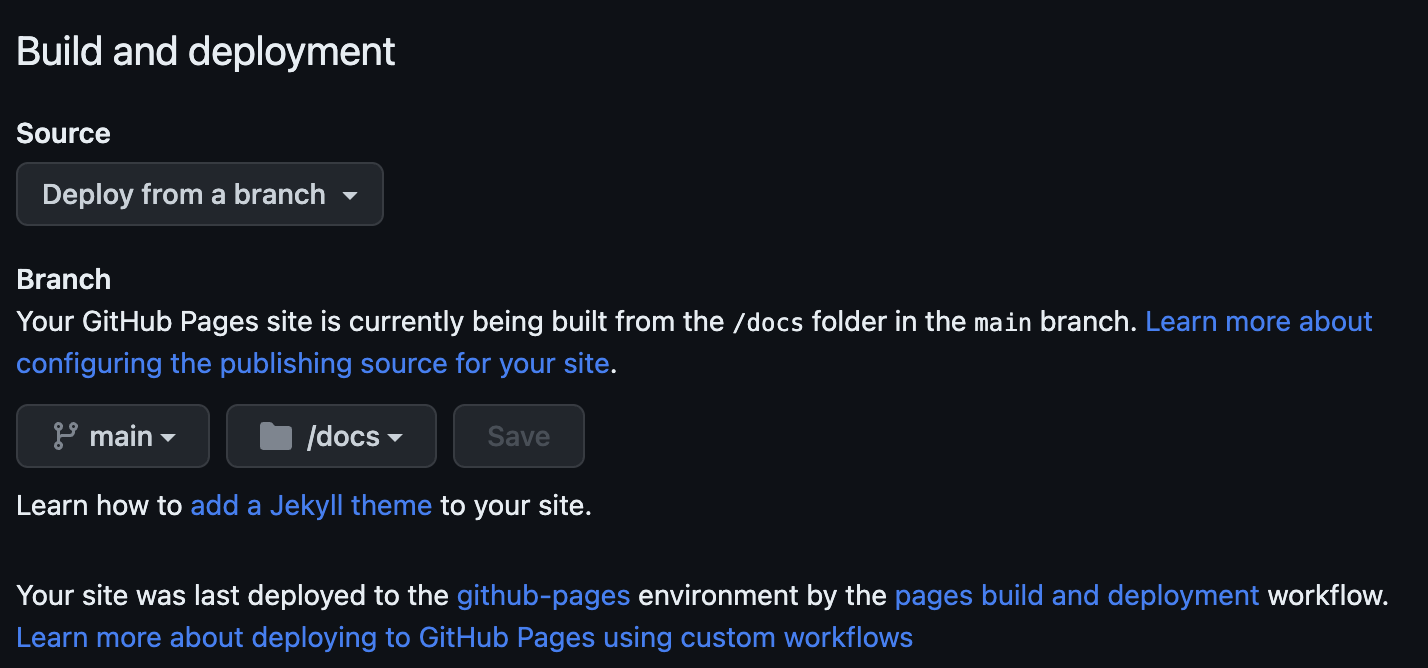
In your repo, click on the Settings button in the top right of the page. Then click on the Pages tab on the left. Under Branch, we want to set our page to:
- build from main
- and render from the /docs folder
Then click Save.
Refresh your page and you should now be able to visit your site! There will be a link at the top of the page. You did it!! Check out your new site.
